|
 Designing a Project Designing a Project
 Translating the Design into Cutting Instructions Translating the Design into Cutting Instructions
 Cutting Segments Cutting Segments
 Gluing and Clamping Rings Gluing and Clamping Rings
 Flattening Rings Flattening Rings
 Gluing up the Project Gluing up the Project
|
|
When cutting segments to make a ring, accuracy in both
its length and cutting angle is important both for the cost of what you
make and the result you obtain. If the angle is not precise, you will
get gaps; they will be on the inside of the rings if the angle is too
large and on the outside if the angle is too small. If the length is
irregular, you will also get gaps. Finally the ring will be too large
or small depending on if the length is long or short.
Just what is the best way to cut your segments? I think I've tried
them all. And, recently, I found a new way that I think beats all
others for accuracy and ease of setup, and time spent. It's the MiterSet tool.
It makes only 2 assumptions about your table saw.
1) The saw blade is parallel to the miter slots.
2) Your miter guage fits sugly in the tool and the slots in your saw's table top.
You have full control over
the former and you ought to be able to address the latter as well.
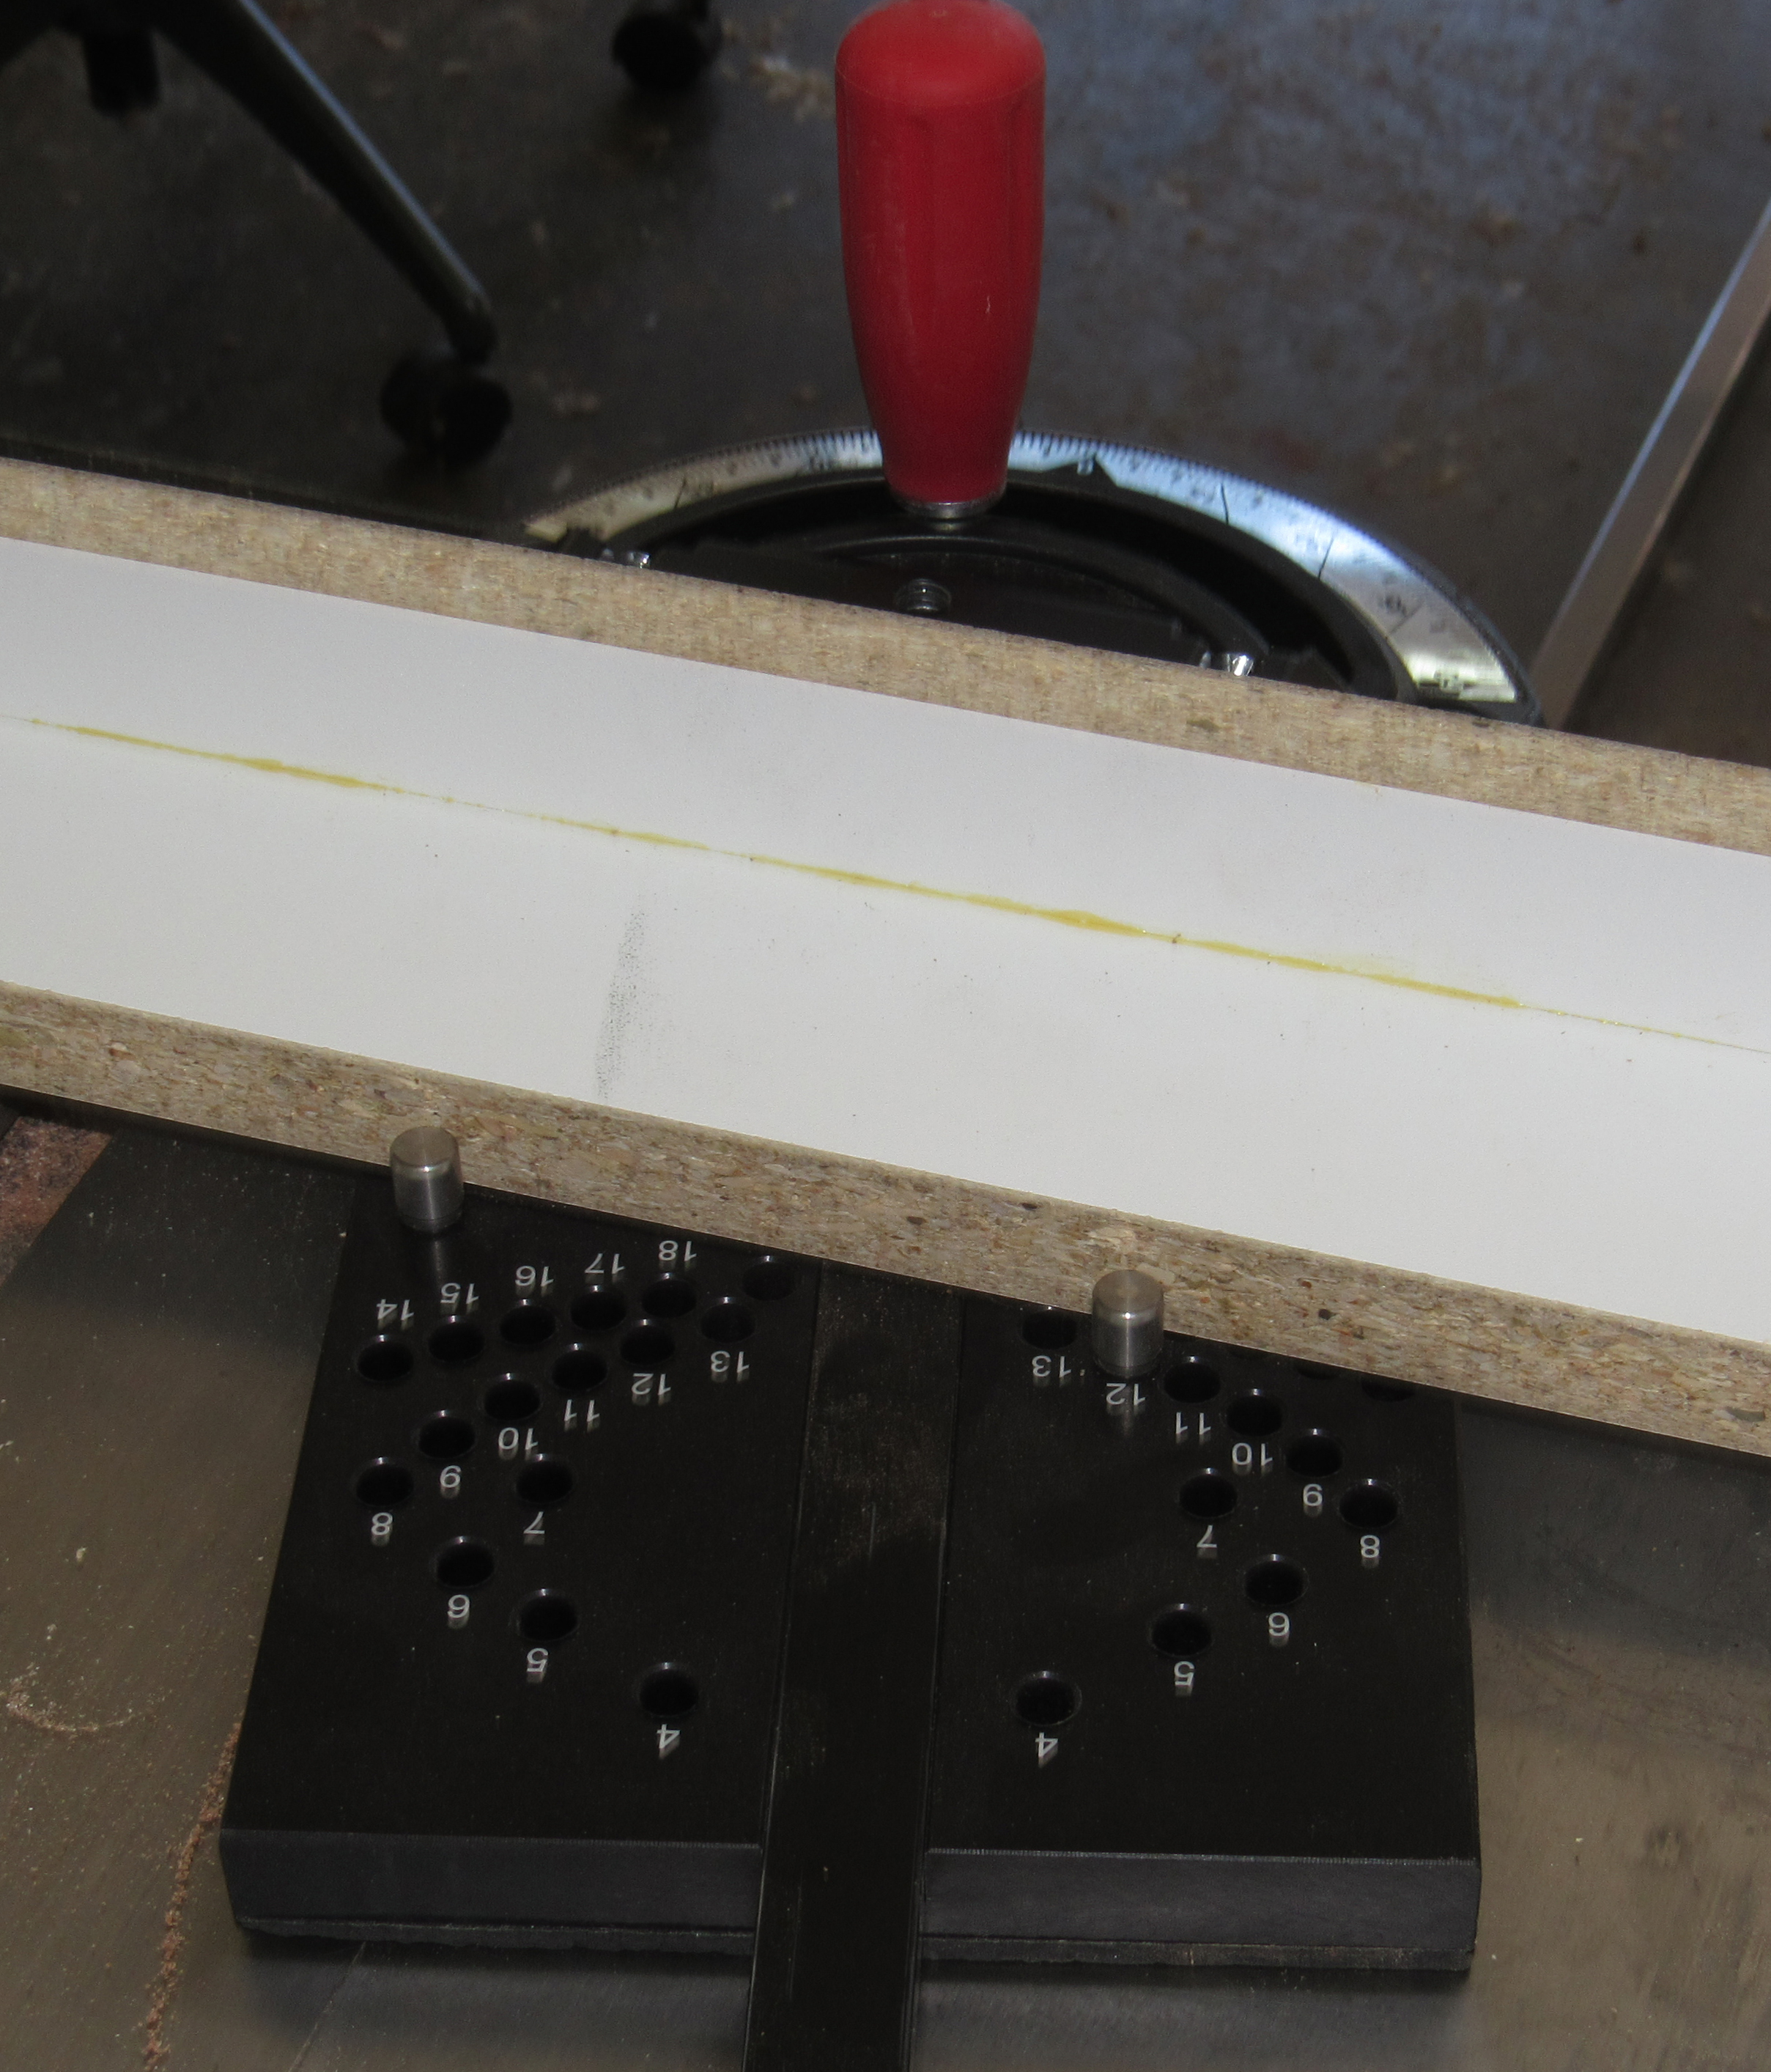
Setup is really simple as shown in this first picture. Place your miter
guage in the tool's slot, set the 2 pins for the number of sides
needed, loosen the lock, and set the face of the miter guage
firmly against the pins. One pin sets the zero point while the other selects
the number of sides. Using the one tool, you can set for any number
of sides from 4 to 20, except 19. The tool is set up symmetrically, so
you can set up for either leading or trailing cuts.
|
|
The setup for cuttting is simple as well. The first picture shows it as
being a simple glue-up of two boards attached to the miter guage so that the board extends
well across the saw blade. The horizontal member is 3 inches wide and
the vertical member is just tall enough to match the height of my miter
guage. That's 1 1/4 inch for me.
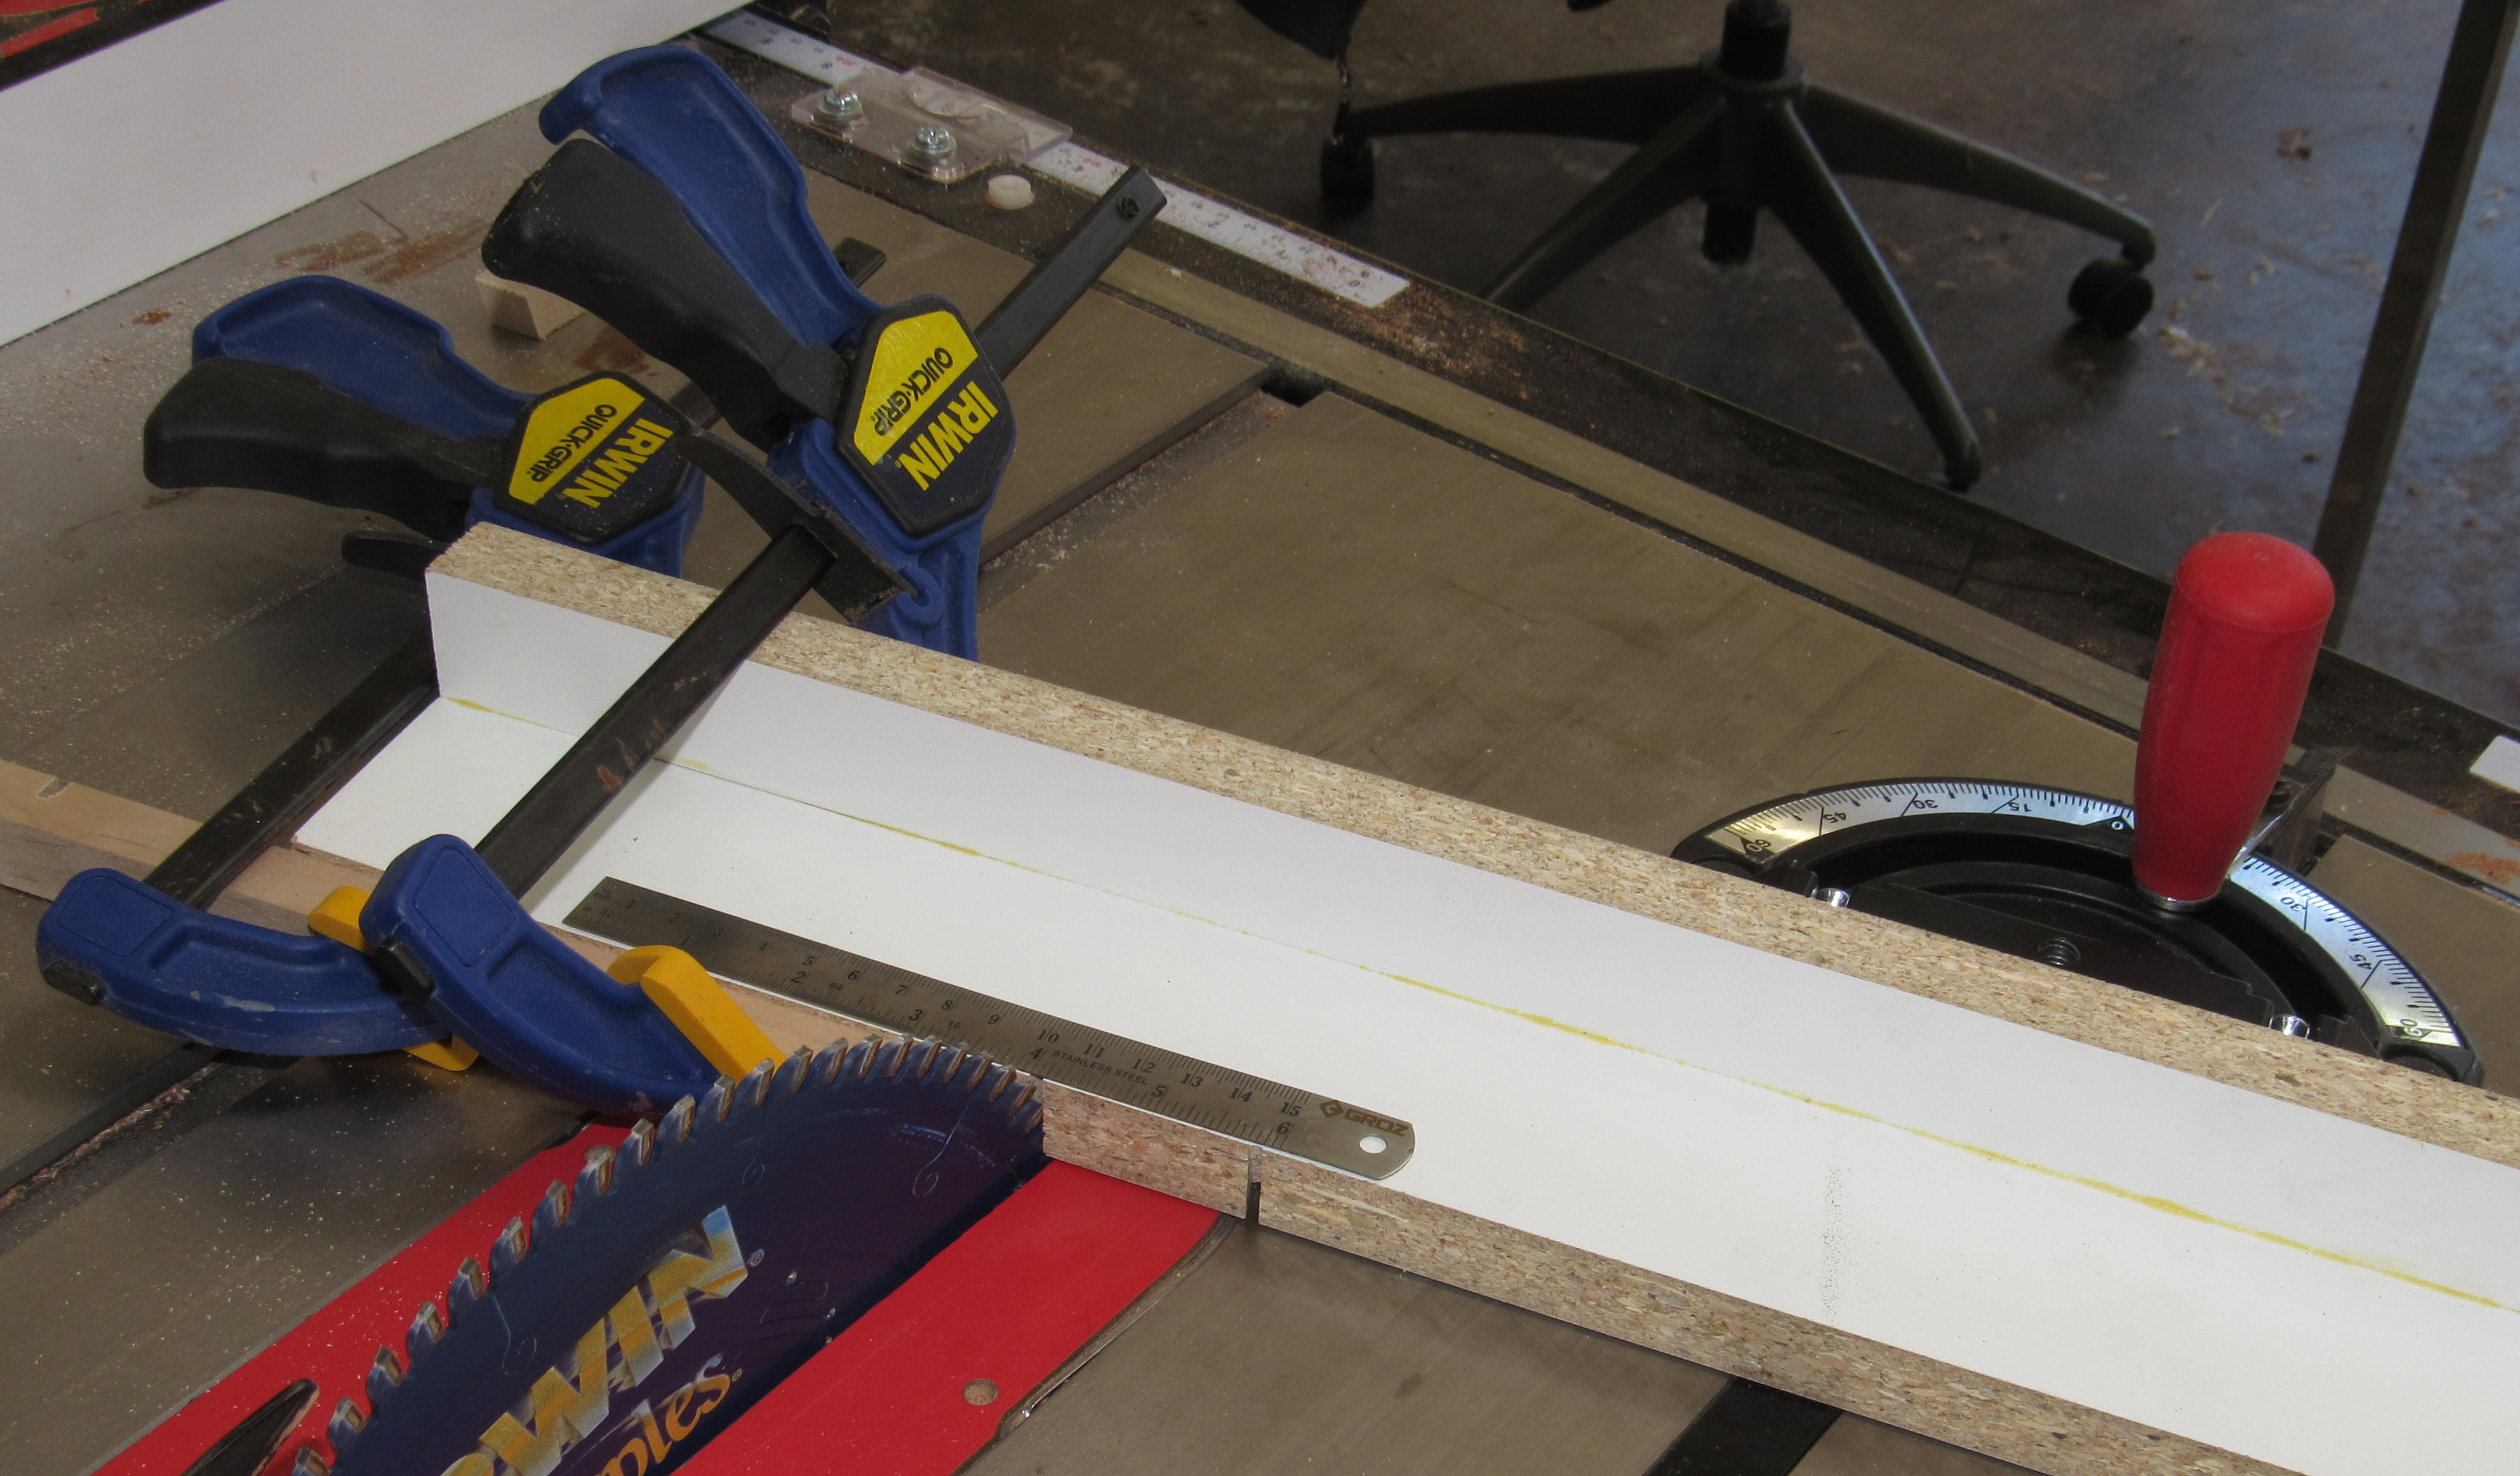
The placement of this assembly extends well across the saw blade, providing
ample room for clamping my stop block as well as the longest segment to
be cut.
Choosing 3" for the horizontal member of the
assembly was so its extension across the saw blade would never be cut
off. Existance of the extension supports the segment being cut so the
cut face of the segment is clean and free of tits. Its existance with a
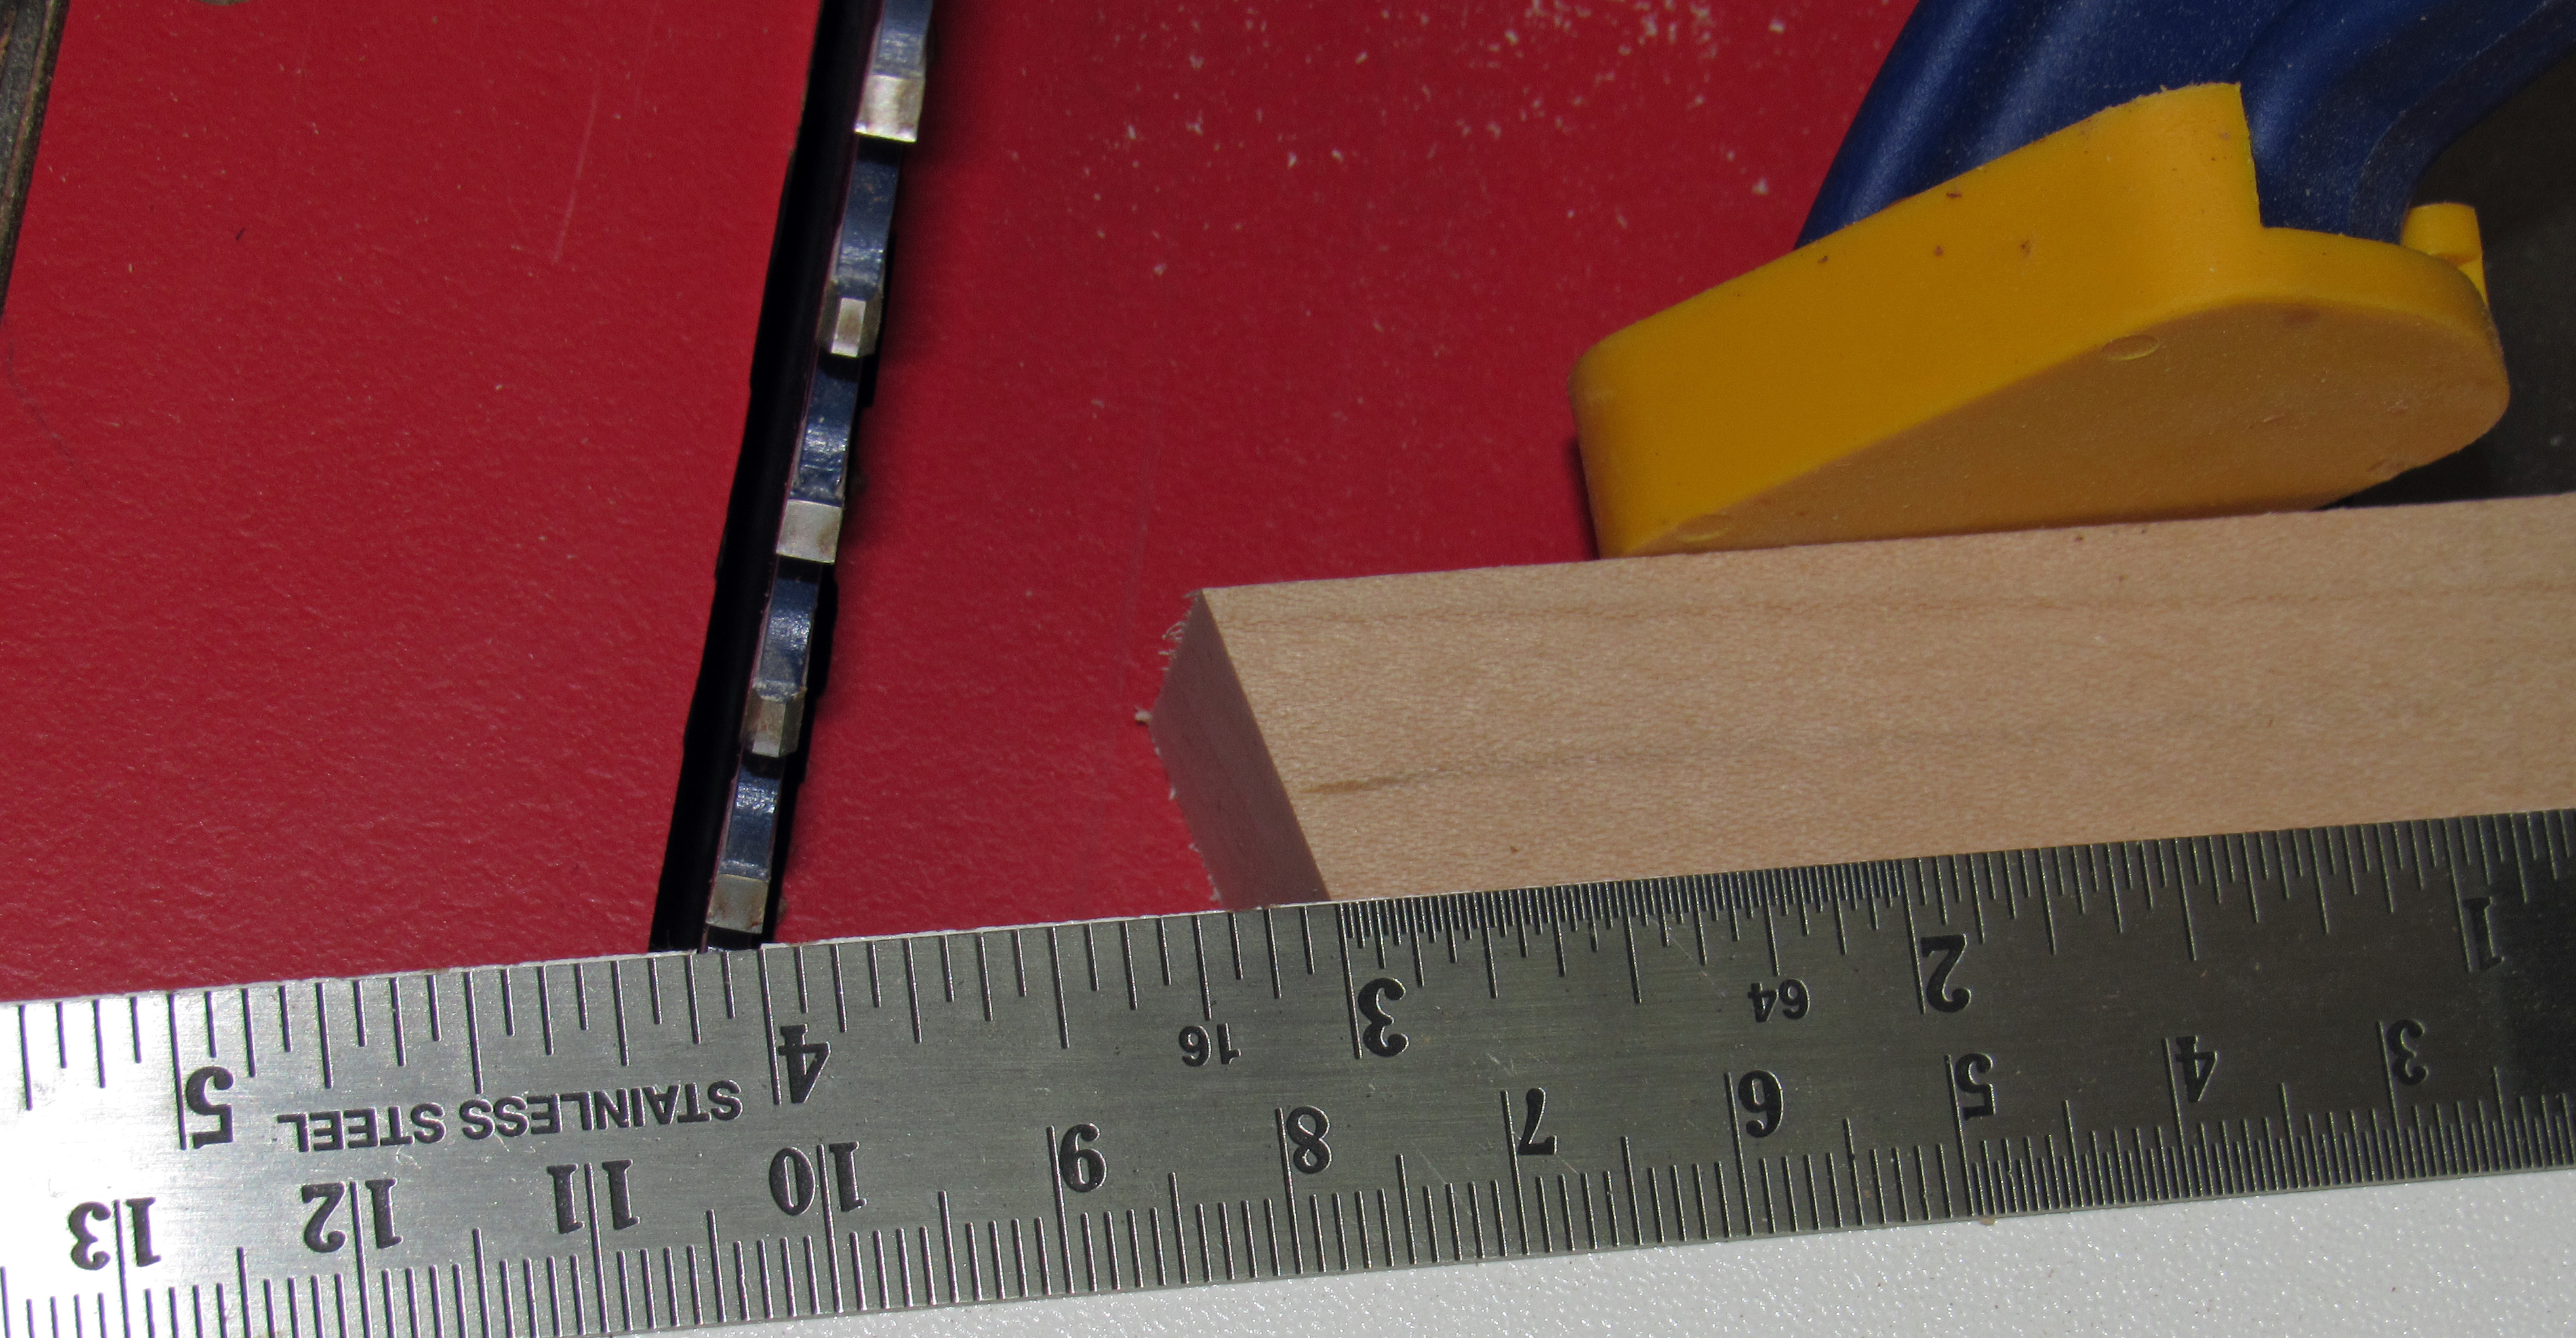
thickness of 3/4" also enables easy measuring/positioning for the stop block as
seen in the second picture. |
 |
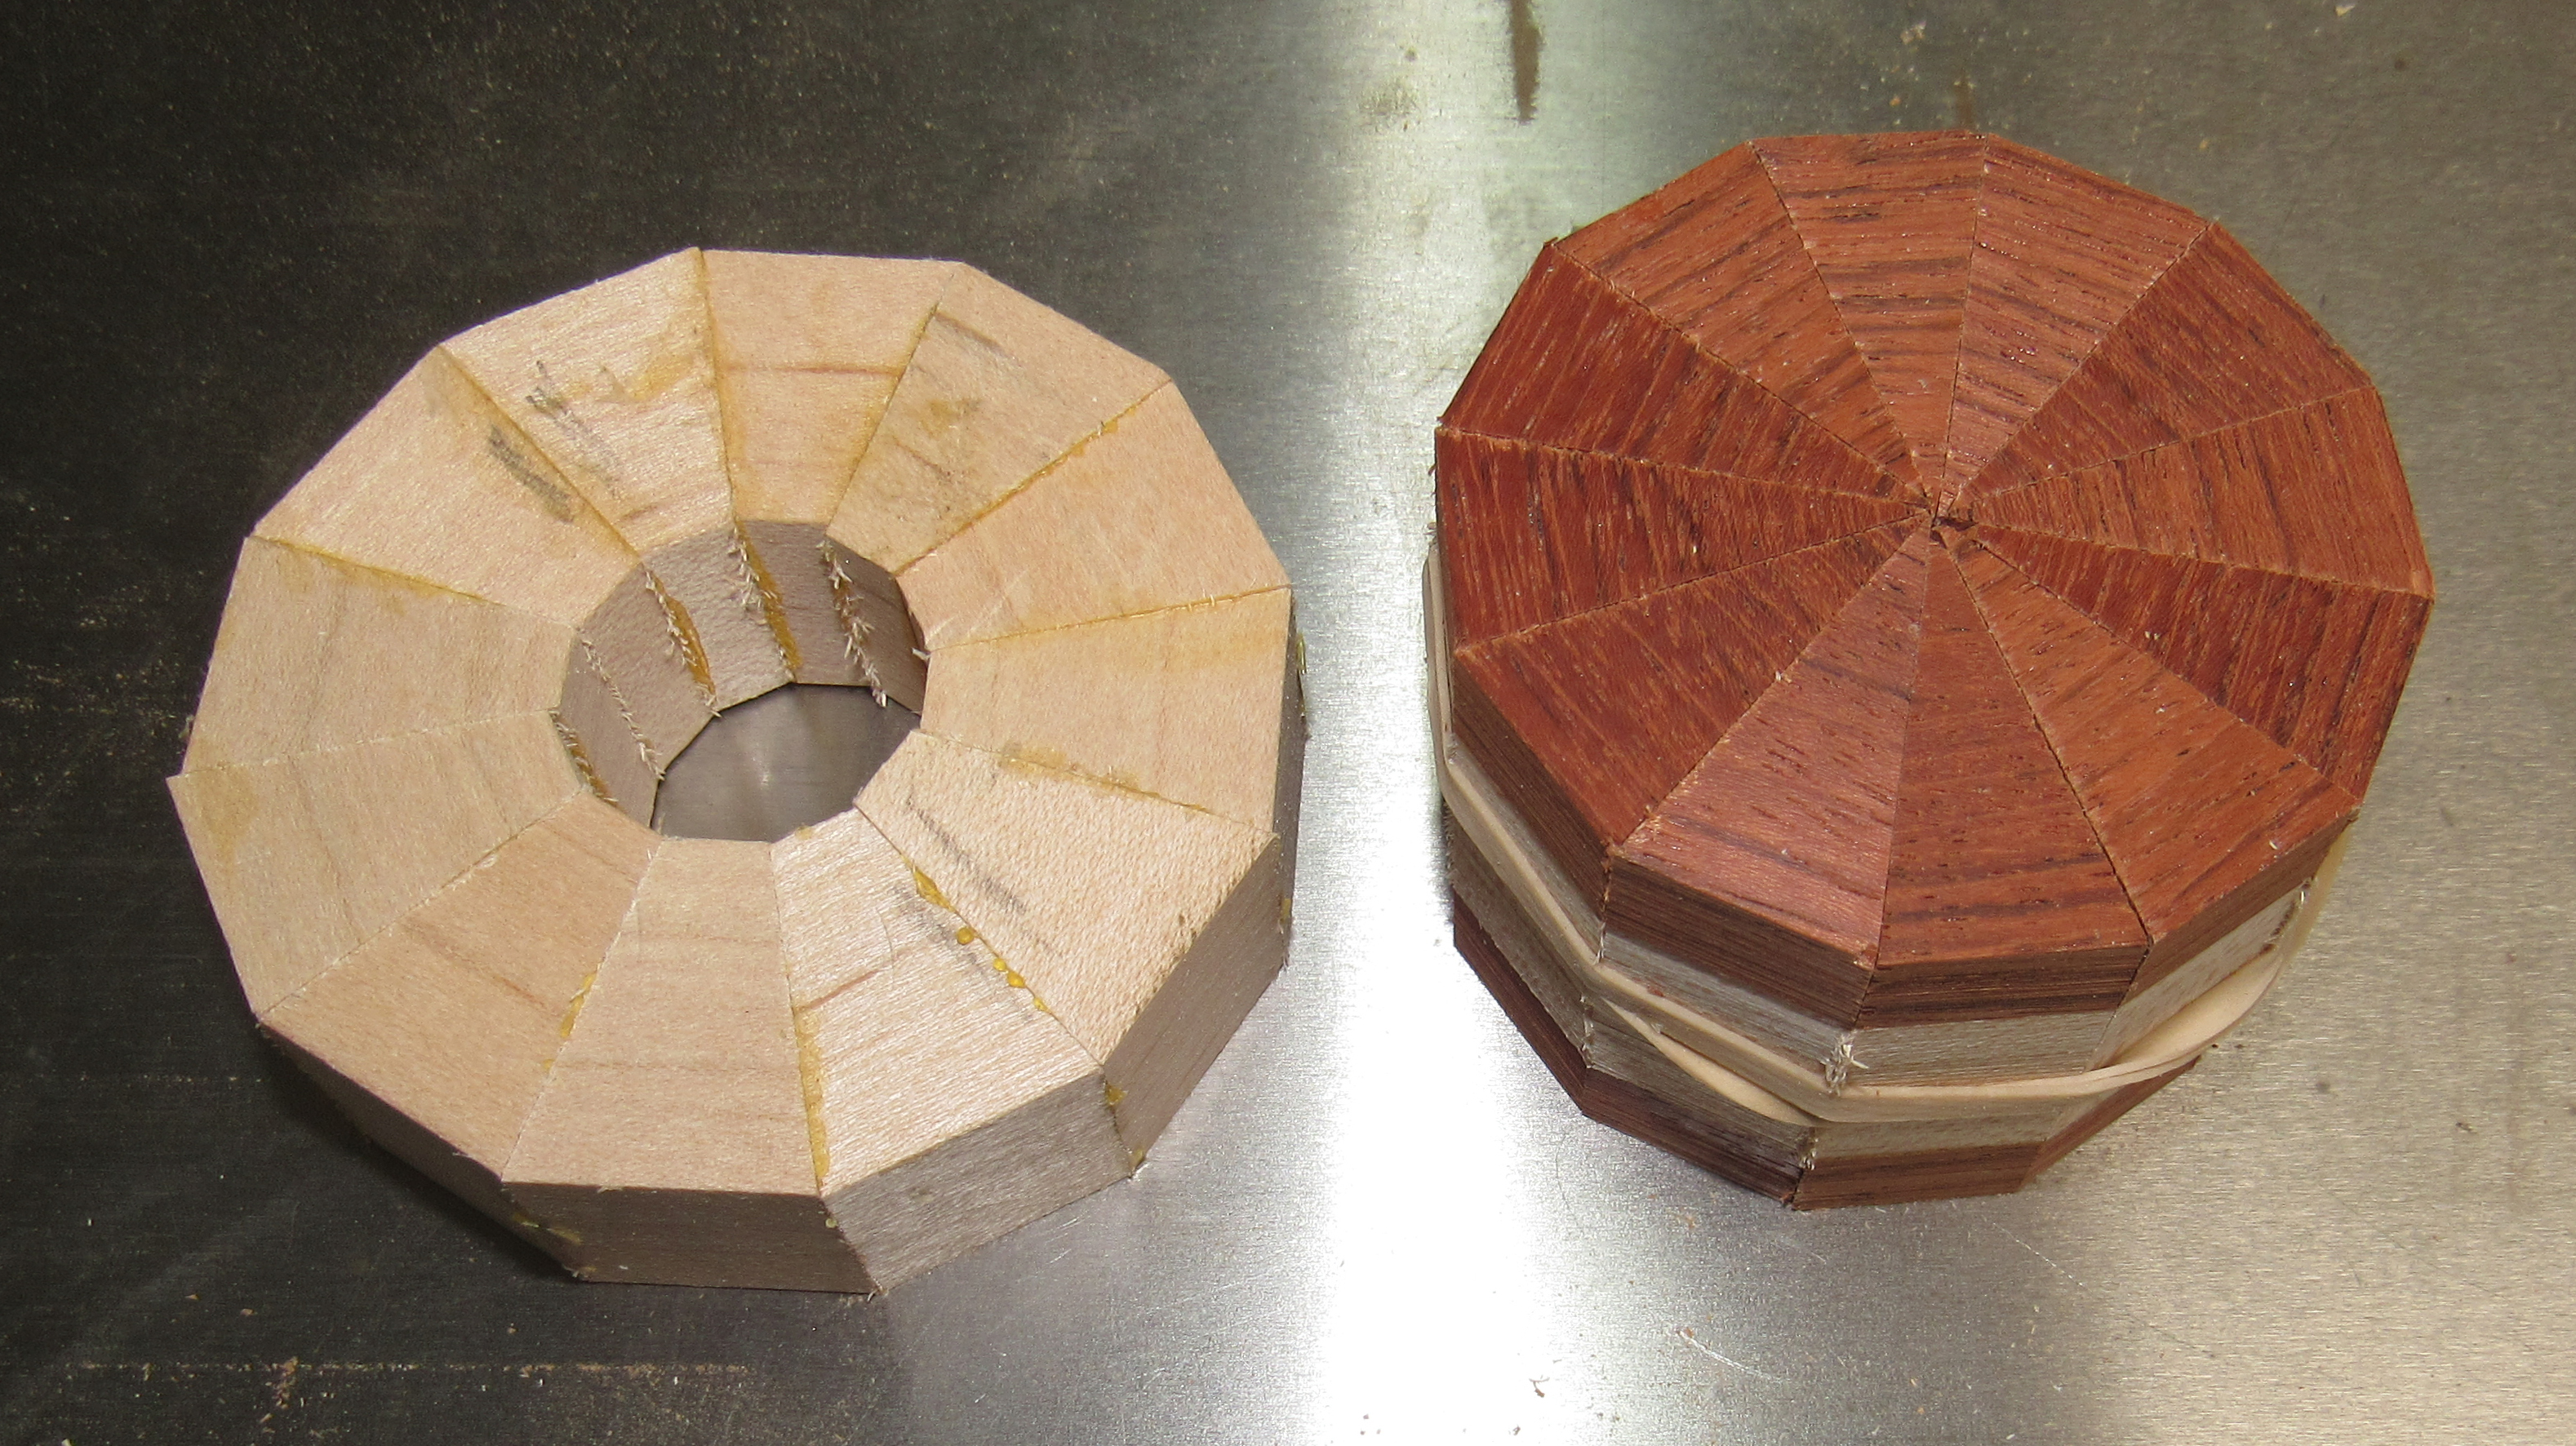
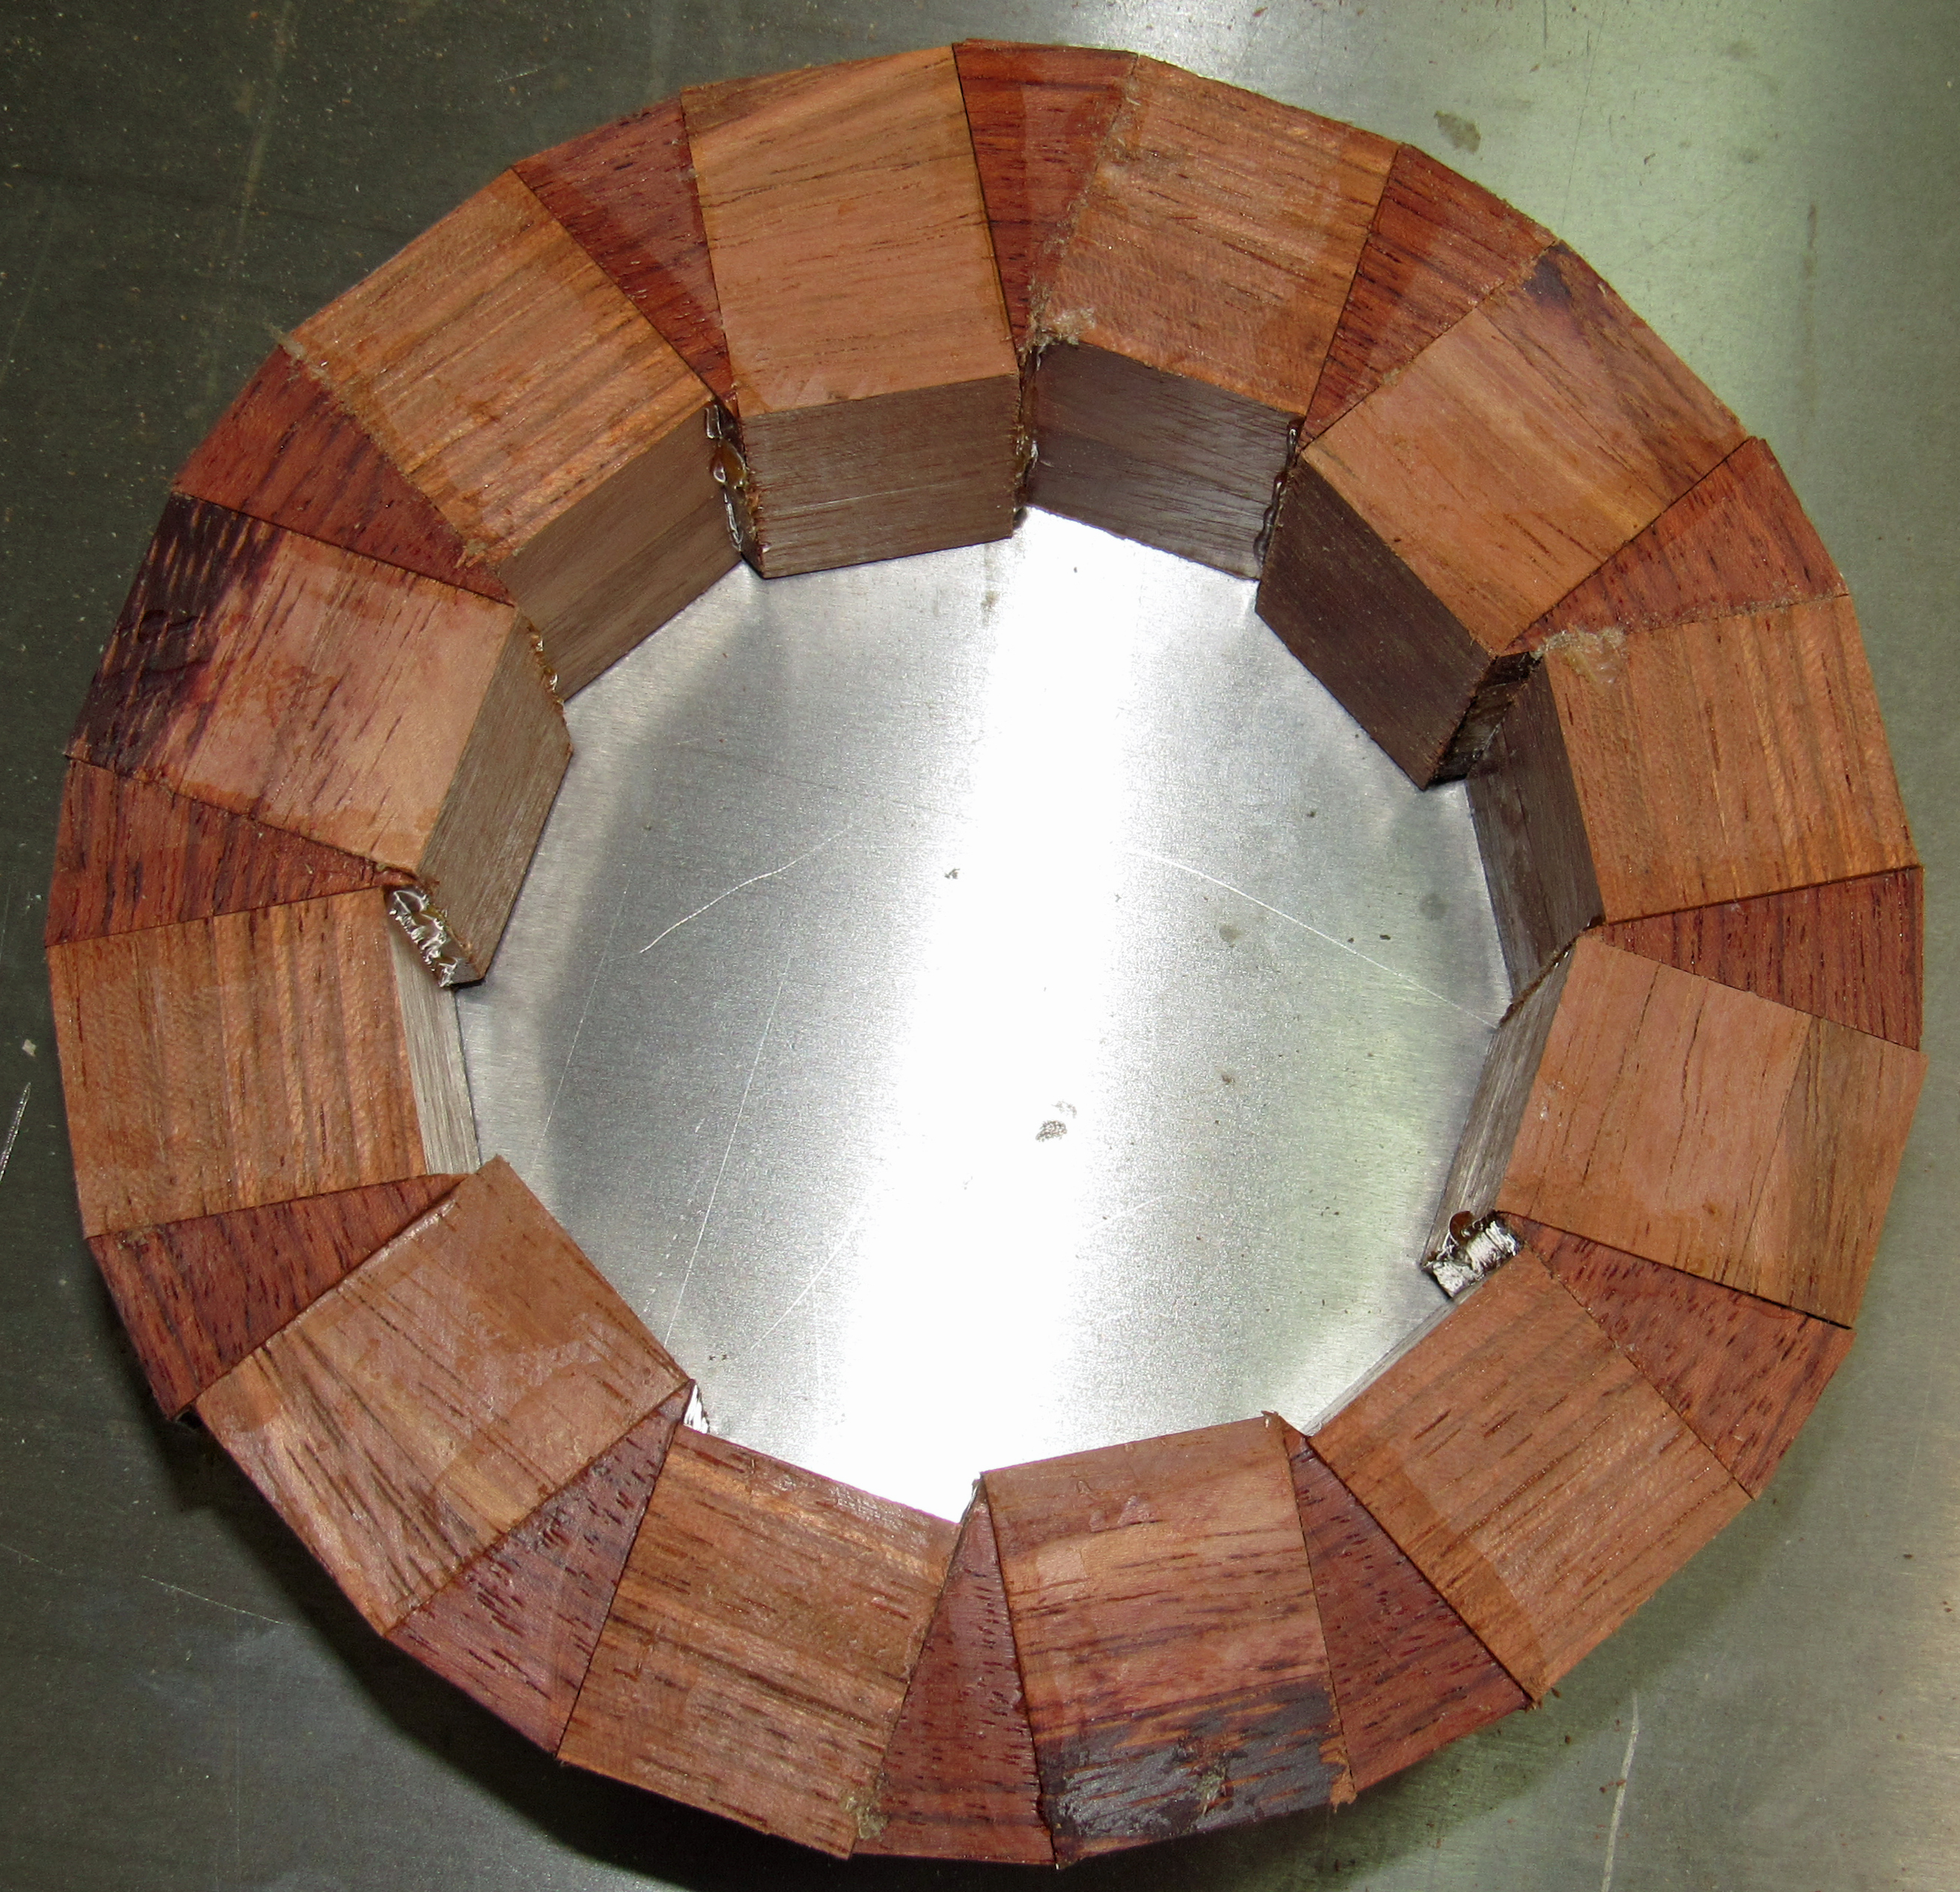
And the last question. What about the accuracy?
MiterSet claims accuracy to within .001 degrees. I've only made 19
rings with it so far, for 12 and 18 sided objects, but the results
are impressive. I've been able to go from cutting to gluing without
adustment. The Maple ring below shows no gaps. The Jatoba ring has just been cut and is
bound in a rubber band to check the fit. To the right is that same set
of Jatoba segments glued up with 7/8" vertical spacers. No adjustment
was required.
Can you expect to get zero adjustent every time? That's probably impossible! But
most of your attempts ought to come out that way. That means less time spent making rings and calibrating miter sleds..
The Miterset tool works with most U.S. made table saws and will cost you $99.99. It's a lot cheaper than an Incra tool and more than the cost of making your own miter sled.
Click here to visit miterset.com
and learn all about it. |
 |
When you set up for cutting segments using a chop saw, miter sled, or band saw, the blade needs to be as close as
possible to vertical. The closer you can get it, the flatter will be the rings you glue up from the segments.
When you cut segments to make a simple ring, you have two basic methods. For what I call the "Economy" method, you
flip the stock you are cutting from over for each cut to take advantage of the edge you just cut. This method gives you
the maximum number of segments for a given length of material. But, since the grain can vary somewhat from one side of the
stock to the other, each segment will be basically unrelated to its neighbor.
For what I call the "Grain Matching" method, you keep the same side of the stock up throughout the entire set of
segments for the ring. To do this you have to turn the stock over and cut a new face. Then turn it back over, to the
original side up, and cut the next segment. The "Grain Matching" method will use 10% to 54% or more material than the
"Economy" method depending on the ring size and the thickness of the wall. This is the price to be paid for having
segments where the grain walks from piece to piece. Sometimes it's worth it!
|