 |
Segmented TurningDesign your first segmented project in 5 minutes with the Segmented Project Planner |
||
|
| Products | Classes | Free Plans | Hints | Buy Now | Gallery | Wood Costs | User Projects | FAQ |
|
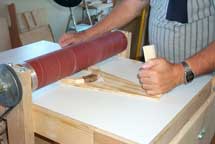
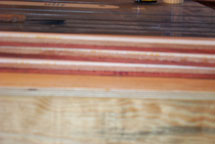
Below are pictures of my project for May of 2003. This is the proof project for two new capabilities of the Segmented Project Planner. The first capability is being able to paint a segment with almost any graphic and the second is use of vertical spacers. The first step was to come up with a graphic to use. I searched all over my CDs full of clip art and landed upon a picture of a breaking wave; seems appropriate for California. Picture 1 shows the picture after I made it suitable for cutting on the scroll saw. Half of the images will be Lacewood on Walnut and the other half will be Walnut on Lacewood. I already had a good shape for the bowl I wanted with my previous "Mountains" bowl. I just repainted the central band with alternating pictures of the wave and modified the adjacent layer above and below to be made from sandwiches of wood colors to complement the picture. Each wave will be framed in Ash and then have two progressively darker colors. The rest of the bowl will be of Cherry. Picture 2 shows the result. You can't see the vertical spacers yet. I need to fix the program's side view display so they will show when a graphic is used. You can see in the picture, that I've used pictures of actual wood grain to show what the Ash and transition woods might look like. The next step is to cut out the inlays of the wave. I milled Lacewood and Walnut to achieve stock that is 3/8" thick by 1 1/2" wide, made 6 two-layer stacks with Lacewood on top and 6 with Walnut on top. Then I glued on copies of the picture, set the scroll saw table at 2 degrees and started sawing. It took a few false starts but I finally ended up with 12 useable pieces. Picture 3 shows two of them with their backing pieces (to get material wide enough to make the ring) ready for gluing. The wave will not be visible from the inside of the bowl. |
||
 Picture 1 |
 Picture 2 |
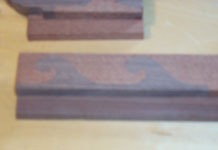 Picture 3 |
|
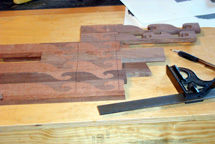
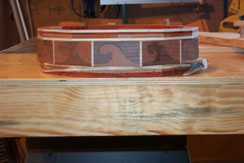
Every glue-up needs lots of clamps. Picture 4 shows all my fabricated stock glued up and clamped. Now for the trickiest part of the project; cutting 12 identical segments from the stock I have fabricated. I do this by picking a point on the picture that I can easily indicate in each copy of the picture; like the leading edge of the wave. Then I mark each piece for where it is to be cut on the left side as shown in Picture 5. The mark is at 5/16" left of the leading edge. I'll line up the mark with the kerf on my miter sled to cut each piece. Then I'll set up the stop on the miter sled for 2 5/8" to make the right-hand cuts. The next step is to make and insert the vertical separator material while gluing up the ring. I made enough stock to take care of the horizontal framing as well so all the material would be of the same dimensiions. Picture 6 shows the finished ring after thickness sanding. |
||
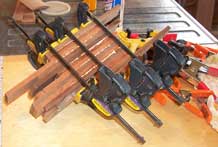 Picture 4 |
 Picture 5 |
 Picture 6 |
|
My next step is to fabricate the colored bands above and below the feature ring. I cut approximate thicknesses of Narra and Paduak and then sanded them to appropriate thickness using my home built "Moritz Designs" drum sander, Picture 7. No, I'm not sanding the strips in this picture, but you do get to see the device itself. This thickness sanding is an important step to ensure that the pieces are of uniform thickness. Picture 8 shows the Ash, Narra, and Paduak glue-ups ready to be segmented. In the quilting trade I'm doing what is called Strip Piecing. Now, after cutting the segments for the two rings, Picture 9 shows them glued and clamped using my two favorite clamp devices. The top one is using two 1/4" rubber bands while the bottom is using a string tourniquet with a clothes pin as the tightener. As you can see, I've stacked them up with the feature ring to get a look at what the finished adornment will look like. |
||
 Picture 7 |
 Picture 8 |
 Picture 9 |
|
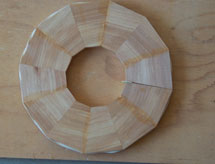
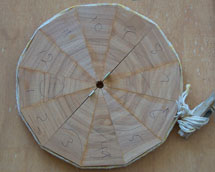
Now it's time to go off and construct the simpler rings. And while I'm at it, Picture 10 shows an example of an excellently cut set of segments. You can see that there are no gaps of any kind. This is my goal. But my goal of perfection is not always achieved on the first try. Picture's 11 and 12 show a small and larger problem with the miter angle and it means it is time to re-tune my miter sled. But not all is lost with these rings as the error is not major. In these two pictures I've glued up the rings to make two halves with spacers inserted to ensure appropriate pressure is applied to all other joints so that they are perfectly mated. In Picture 11 I've used just rubber bands to clamp it while I had to resort to the more forceful tourniquet approach in Picture 12. |
||
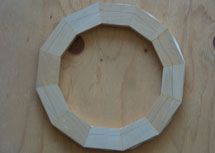 Picture 10 |
 Picture 11 |
 Picture 12 |
|
Picture 13 shows my favorite method of fixing the gap problem with the two rings. It's a flat, 10" disk with sand paper afixed to both sides. Just exchange it for the blade in my table saw and just a couple of minutes will do the trick. You can see that I'm just about at the limit of this method in ring size. Just a couple of minutes was all that it took. Picture 14 shows the two rings and they're now perfect. In Picture 15, an number of things have happened. First the two bottom rings, shown separately in Picture 14 are now one piece. Then I used an expansion chuck inside of the upper layer to chuck up the piece temporarily so that I could fix up the bottom of the piece for expansion chucking for the rest of the project. No need to set up a chamfer since this configuration will be brief and the bowl has practically no height so there will be little chance of the piece coming out of the chuck. Having done that, it looked sort of plain. So I followed Richard Raffin's advice to do a little decoration of the bottom of the project. Lastly, I did a little roughing work on the outside. |
||
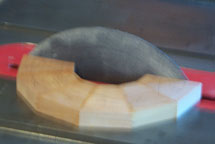 Picture 13 |
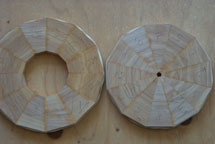 Picture 14 |
 Picture 15 |
|
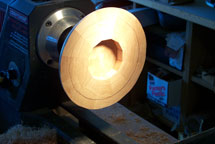
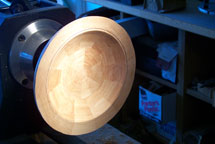
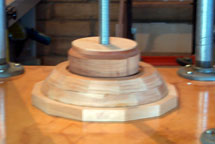
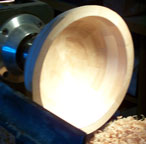
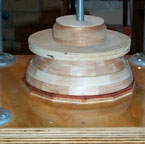
In Picture 16 I've now turned the piece around on the chuck and you can see where I've marked for the inner edge of the next layer. I'll use this mark as a guide for where to stop my initial turning of the inside. In just a few minutes more, Picture 17 shows the initial shape of the inside. In Picture 18, it's back to the press to glue on the next layer. |
||
 Picture 16 |
 Picture 17 |
 Picture 18 |
|
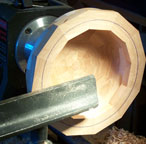
Just in case you didn't catch it, here's the same process two layers later. Picture 19 shows the rough bowl inside as determined by the size of the next layer. In just a few minutes more, Picture 20 shows the revised initial shape of the inside. You can see that I've been playing a little bit with the outside as well. In Picture 21, it's back to the press to glue on the lower sandwich layer. It turned out that this layer is perfectly centered. I need to do this again two more times! |
||
 Picture 19 |
 Picture 20 |
 Picture 21 |
Want to look at one of my previous projects? Just Click Here...
