 |
Segmented TurningDesign your first segmented project in 5 minutes with the Segmented Project Planner |
|||
|
| Products | Classes | Free Plans | Hints | Buy Now | Gallery | Wood Costs | User Projects | FAQ |
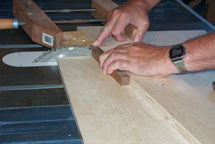
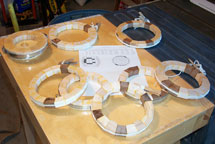
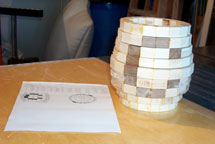
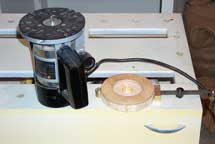
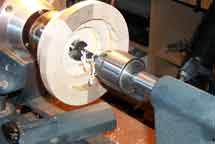
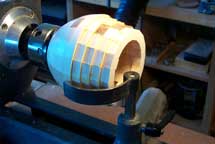
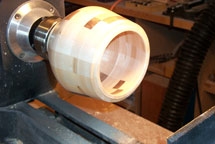
Below are pictures of my project for January of 2002. This one is a cookie jar with a large, simple "C" set in the side wall as a mosaic. There will be a total of 182 pieces, counting the as yet undefined lid and two plugs. You can see it in the Plans section of this site. The thing that makes this project unique is that it is my first one designed entirely with the Segmented Project Planner; no TurboCAD, no grid pad, just the program! The base wood is Maple and the "C" is Black Walnut. Picture 1 shows me cutting one of the Walnut segments using a simple sled. In this first cutting session, I cut the 162 segments and glued up all nine layers in about half a day. Picture 2 shows all of the glued up rings. The smaller ones are clamped using stainless steel hose clamps while the larger ones are clamped "tourniquet" style. In the center of the picture you can see the plan for the project. In Picture 3 I have stacked the glued up rings to see how it will look. The stack matches the picture! |
||
 Picture 1 |
 Picture 2 |
 Picture 3 |
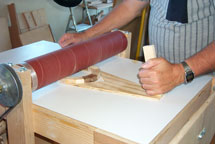
Picture 4 shows the next step in the project; flattening the rings. Here I'm using my drum thickness sander I made using plans from http://www.moritzdesigns.com/sander/sander.html. I surfaced all nine layers in a little over an hour. The next step, for me at least, is getting the base ready for chucking. I use a Nova chuck which requires a 1/4" deep dovetail cut. Picture 5 shows my template hot-glued to the base ready to be attacked by the router. After routing out the dovetail recess, I'll use a putty knife to remove the template. Before I get too far, I'd better install the plug in the base layer. Picture 6 shows the initial hole being drilled out with a Forstner bit. |
||
 Picture 4 |
 Picture 5 |
 Picture 6 |
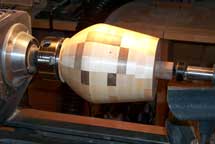
Picture 7 shows the cookie jar all glued up. The first four layers were turned before gluing on the last five. About an hour later, Picture 8 shows the outside of the cookie jar nearly finished. I've got the shape I wanted and the rough sanding has been completed. All that's left to do here is finish sanding. For me, the next step will be the hardest because I haven't particularly mastered the art of inside turning on a concave surface. You'll note, however, that the shape of the top part of the jar isn't very concave. That should make it easier for me. A not-so-funny thing happened on the way to Picture 9. Two segment joints in the bottom layer started to open up. Either I go too ambitious with the chuck key or I made the fit of the plug too tight. The natural result was that the whole thing started to wobble and the project could not be finished without taking remedial steps. So I had to 1) design and fabricate a lid that could be firmly chucked up; 2) face off the top layer of the cookie jar and glue on the lid; 3) turn the piece around, chuck it up via the lid, cut off the bottom layer; 3) fabricate a new bottom layer; and 4) glue on the new bottom layer. The picture shows the result. It almost looks like it never happened. At this point the outside pretty much complete. I'll finish off the lid after getting the inside turned. |
||
 Picture 7 |
 Picture 8 |
 Picture 9 |
Picture 10 shows the inside of the cookie jar, now turned and with an accommodation for the lid. Now for the final shot, Picture 11. I've finished the lid and the whole project is sanded smooth. I'm going to try using Deft this time for the finish. After finishing, I'll cut off the sacrificial plywood ring on the bottom. |
||
 Picture 10 |
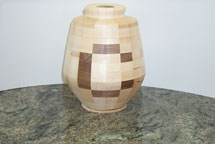 Picture 11 |
|
Want to look at one of my previous projects? Just Click Here...
| What's Up | Resource Index&Links | Classes | Free Plans | Hints | FAQ | SiteMap | Downloads |
Contact US: 4614 SULLIVAN way || Santa Rosa, CA 95409 || Phone: (805) 202-9537 || Email: bkandler@segmentedturning.com
Page Last Updated: 4/22/2024