 |
Segmented TurningDesign your first segmented project in 5 minutes with the Segmented Project Planner |
||
|
| Products | Classes | Free Plans | Hints | Buy Now | Gallery | Wood Costs | User Projects | FAQ |
This project isn't exactly about segmented turning, but it does deal with an important aspect of a lathe project: the finishing. I got tired of always having drips and sags (Martha Stewart's father called them snots) in my finish when I didn't spend enough time periodically making a partial turn of the lathe after applying a finishing coat. I couldn't use the lowest speed of the lathe; at 400 rpm the finish just flies off in all directions. So I decided to build a low-speed attachment. The indexing wheel on my lathe easily be removed and there is a mount for attaching a cover to protect the spindle shaft. So I made a plate with holes to match the spindle cover mount, found a small motor at www.sciplus.com, and hinge-mounted the motor to the plate. Then I made a large wooden "pulley" for the shaft of the motor to drive via a piece of rubber tubing slipped over the motor shaft. I fastened the "pulley" to the indexing wheel via screws through the indexing pin holes plus two extra holes I drilled. The result, when I drive the lathe with the small motor instead of its internal power, is a system that runs at something like 1 rps. That's slow enough avoid the rotational splatter effect and fast enough to prevent the runs while the finish sets up. I turn it on, apply the finish, and let it continue to run (perhaps with a gental fan blowing on the work piece) for 10-15 minutes. This allows the finish to dry enough that sags will no longer occur. |
||
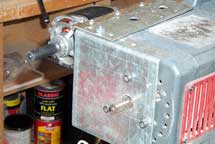 Picture 1 |
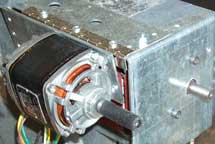 Picture 2 |
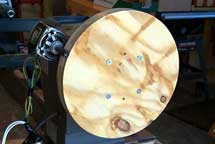 Picture 3 |
While I found the motor used here at
www.sciplus.com, they aren't the only game around. Search for "surplus
ac gear motor" and you'll find several other sources such as:
|
||
Want to look at one of my previous projects? Just Click Here...
